Tuesday, April 20, 2021

Painting Warriors of Middle Earth: Harad


Welcome back, everyone, to the next in this ongoing series of tutorials. This week, based on several requests, we're going to take a look at the Haradrim!

Similar to the Rohirrim, warriors of Harad have a strong central colour scheme, this time of brass, black and dark red. Here, we'll be looking at how to tie this core palette together across the model, using things like using red washes on the brass, and bringing in black to shade the red cloth, to create a really strong, unified final appearance. I've seen people use both dark blue and purple as a third, spot colour on Haradrim fabric alongside the black and red. Here, I've gone for a dark reddish-pink, again to try and keep the various tones of the model consistent. Anyway, without further ado, let's crack on!


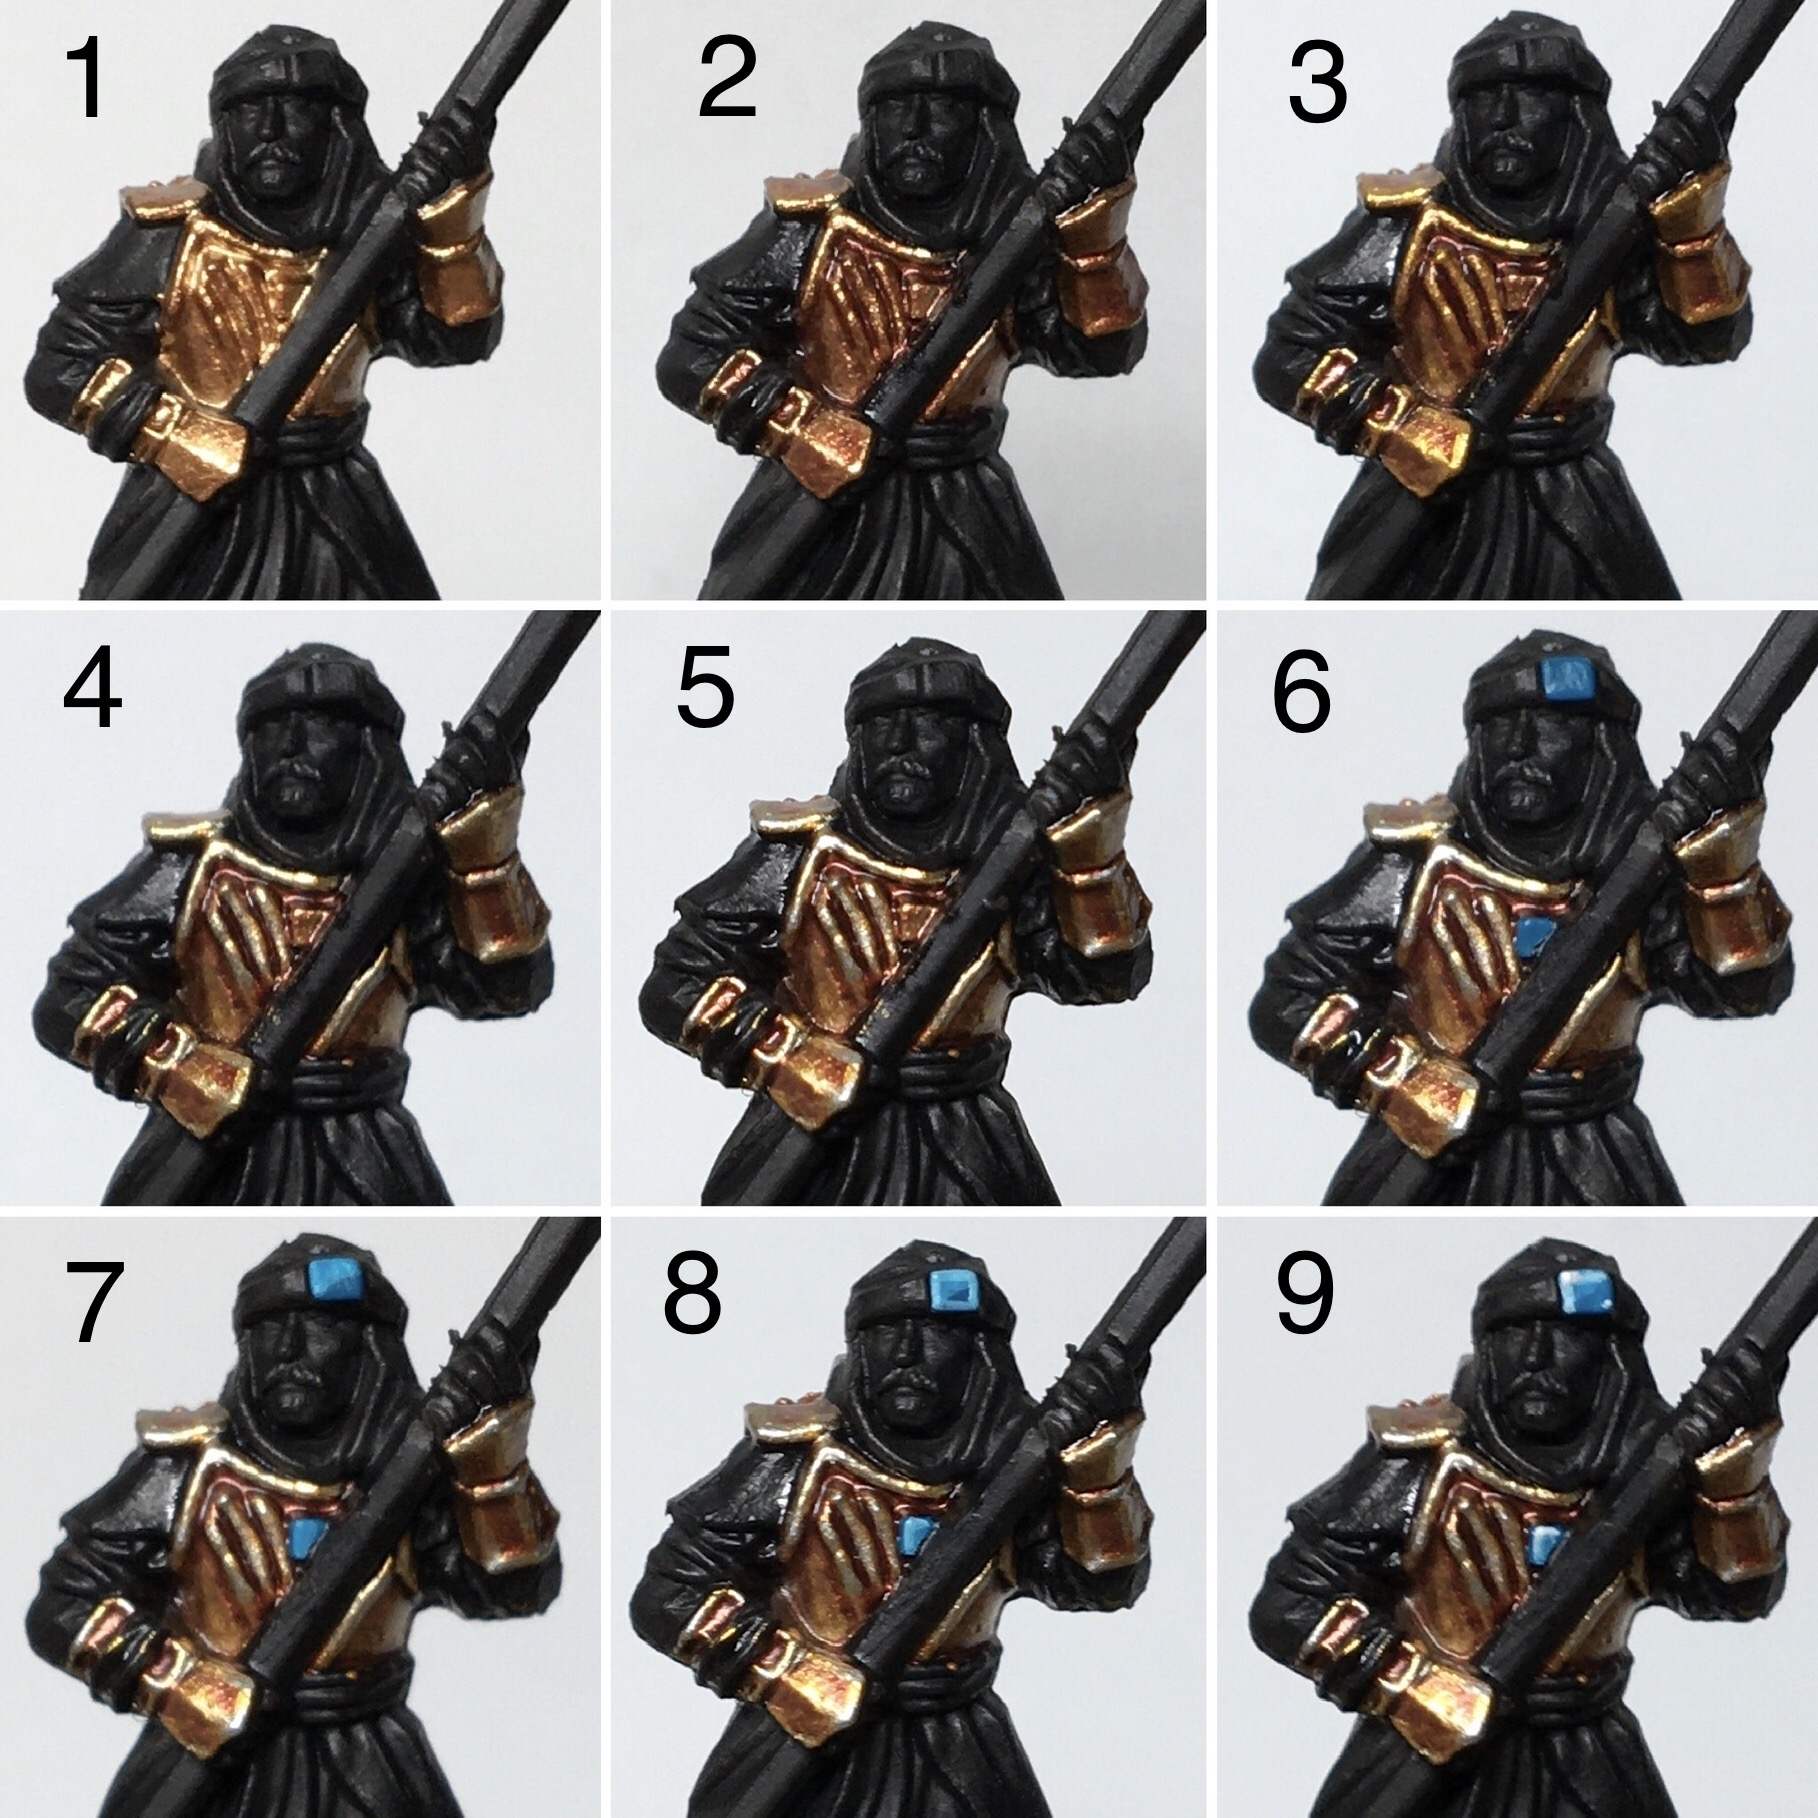
Bronze armour and gems

1. Basecoat Warplock Bronze
2. Wash with Carroburg Crimson
3. Layer Retributor Armour
4. Edge highlight 50/50 Retributor Armour / Stormhost Silver
5. OPTIONAL: Spot highlights with pure Stormhost Silver on the sharpest edges
6. Basecoat gems with Sotek Green
7. Layer most of the gem Temple Guard Blue, leaving a small amount of Sotek in the lower right corner
8. Edge highlight the upper edges with 50/50 Temple Guard Blue / White Scar, leaving a small amount of both previous layers showing
9. Place a small dot of White Scar in the top left and lower right corners


Darker skin and grey facial hair

1. Basecoat skin 50/50 Bugmans Glow / Rhinox Hide
2. Layer skin with pure Bugmans Glow
3. Highlight raised areas with 50/50 Bugmans Glow / Flayed One Flesh
4. Spot highlight the most raised points (nose, cheeks etc) with pure Flayed One Flesh
5. Basecoat beard Dawnstone
6. Highlight beard with Grey Seer
7. Paint eyes with White Scar
8. Carefully dot in the pupils with Abaddon Black
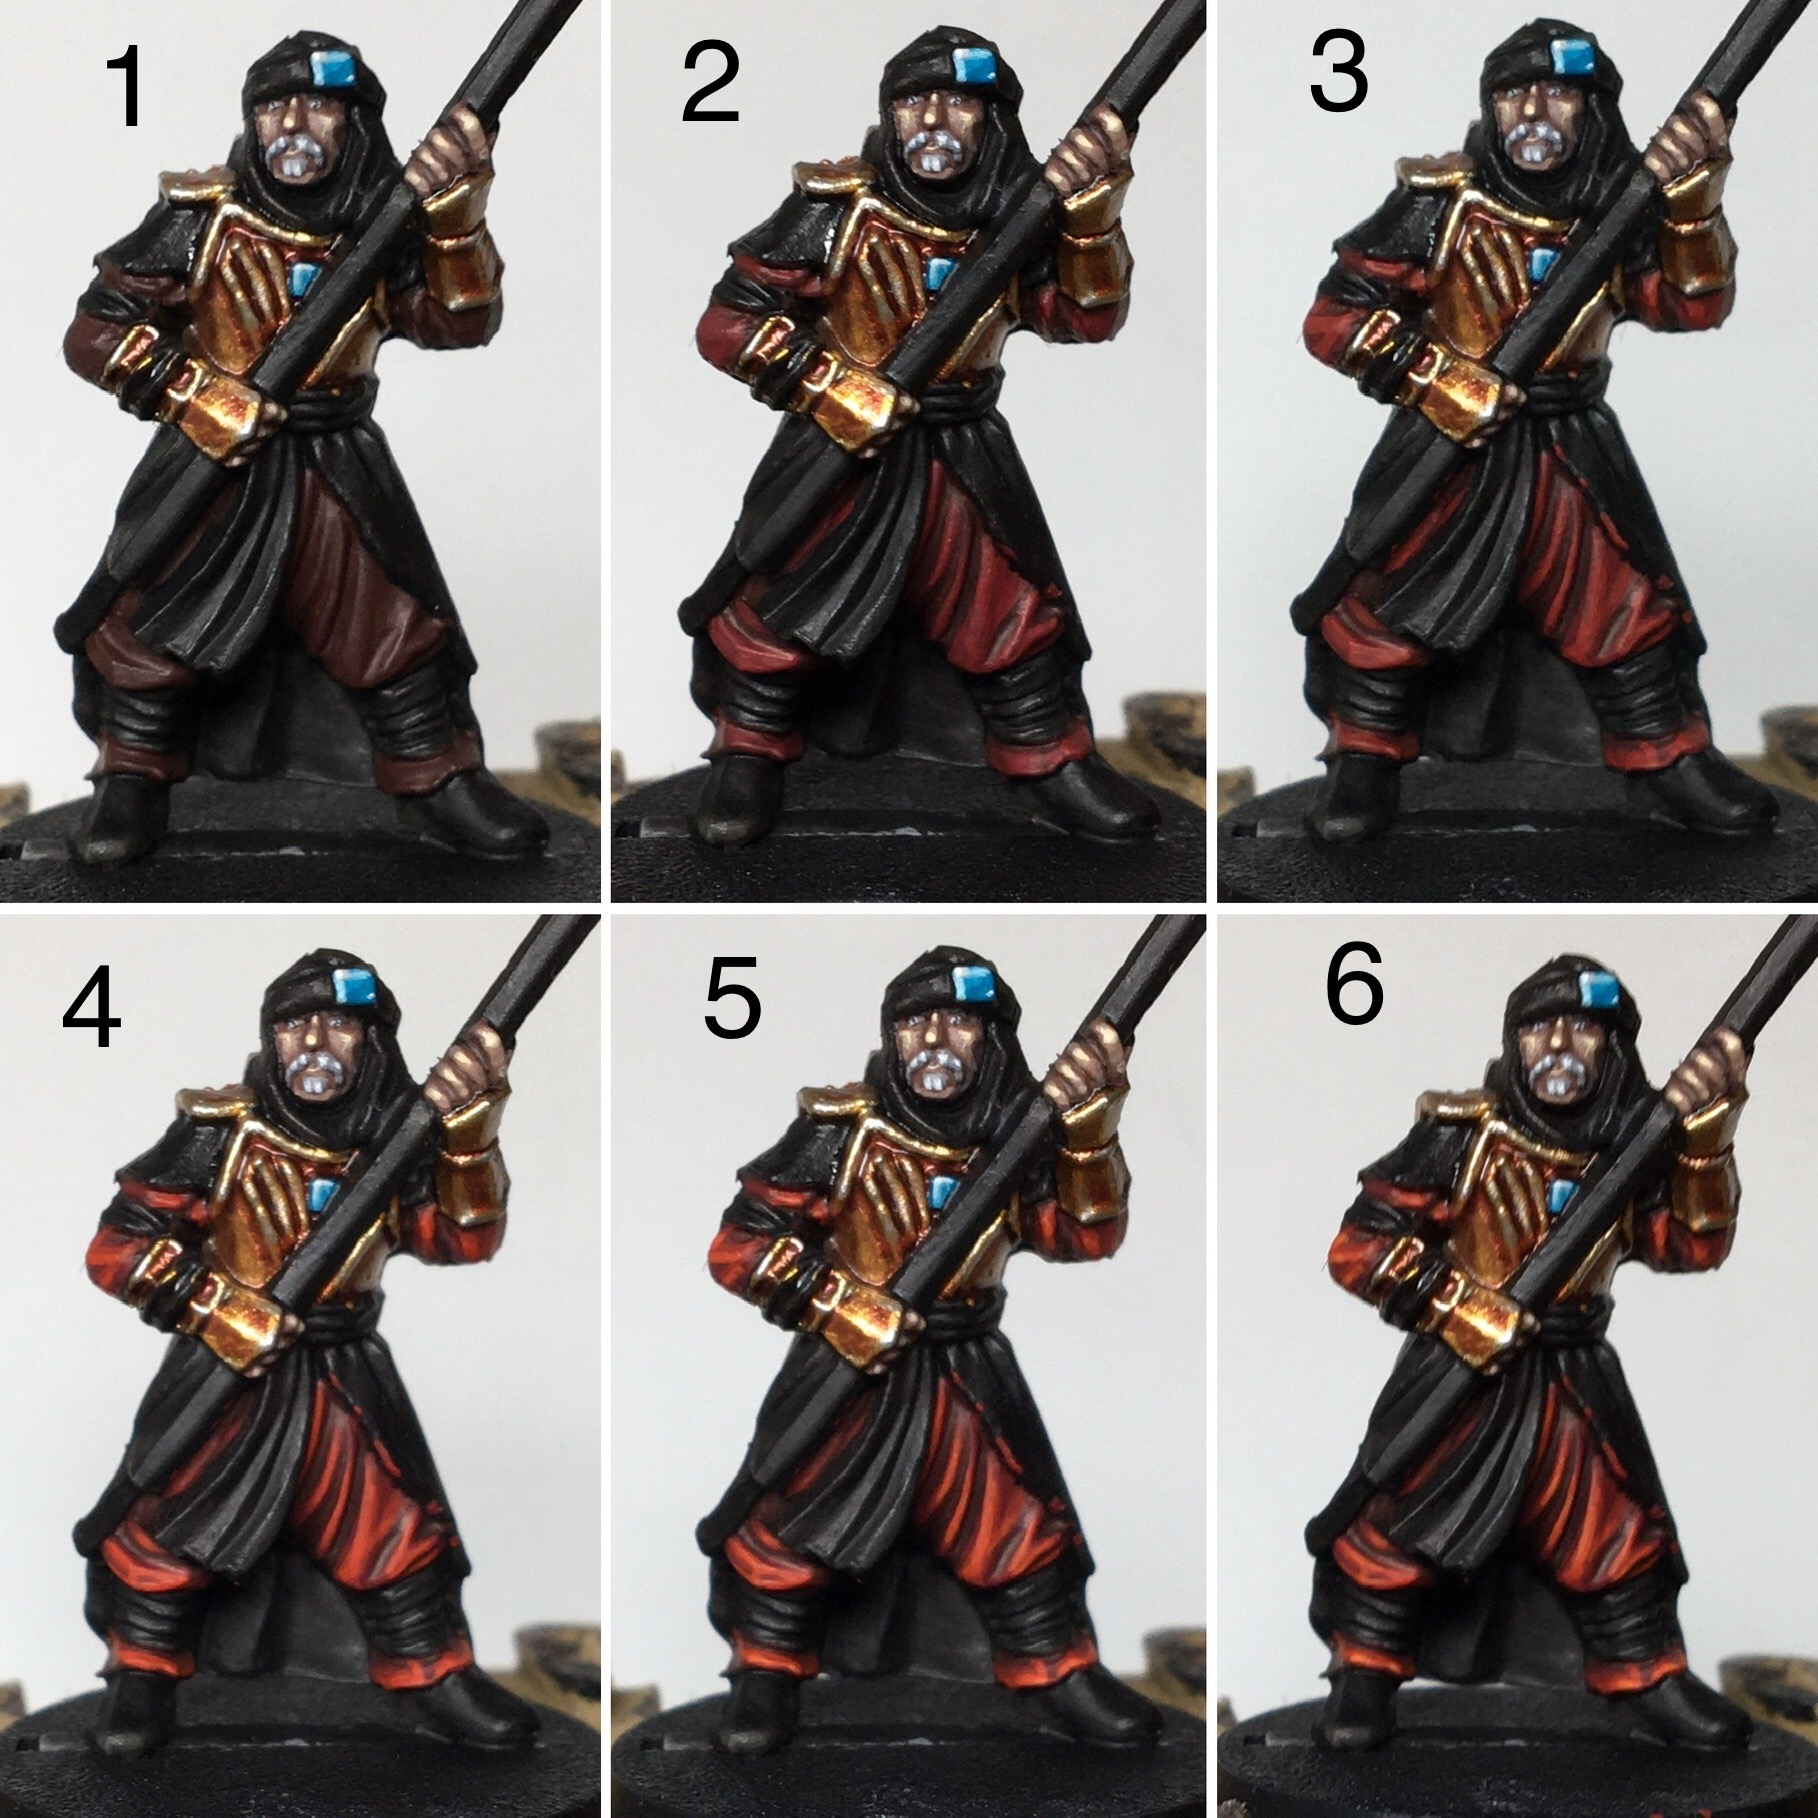


Red cloth

1. Basecoat red areas with a mix of 50/50 Rhinox Hide / Khorne Red
2. Layer over pure Khorne red, leaving only the deepest recesses undercoated
3. Layer 50/50 Khorne Red / Evil Sunz Scarlet over most raised areas
4. Layer pure Evil Sunz Scarlet, over an even smaller area
5. Edge highlight with 50/50 Evil Sunz Scarlet / Trollslayer Orange
6. OPTIONAL: Spot highlight pure Trollslayer Orange on the sharpest folds


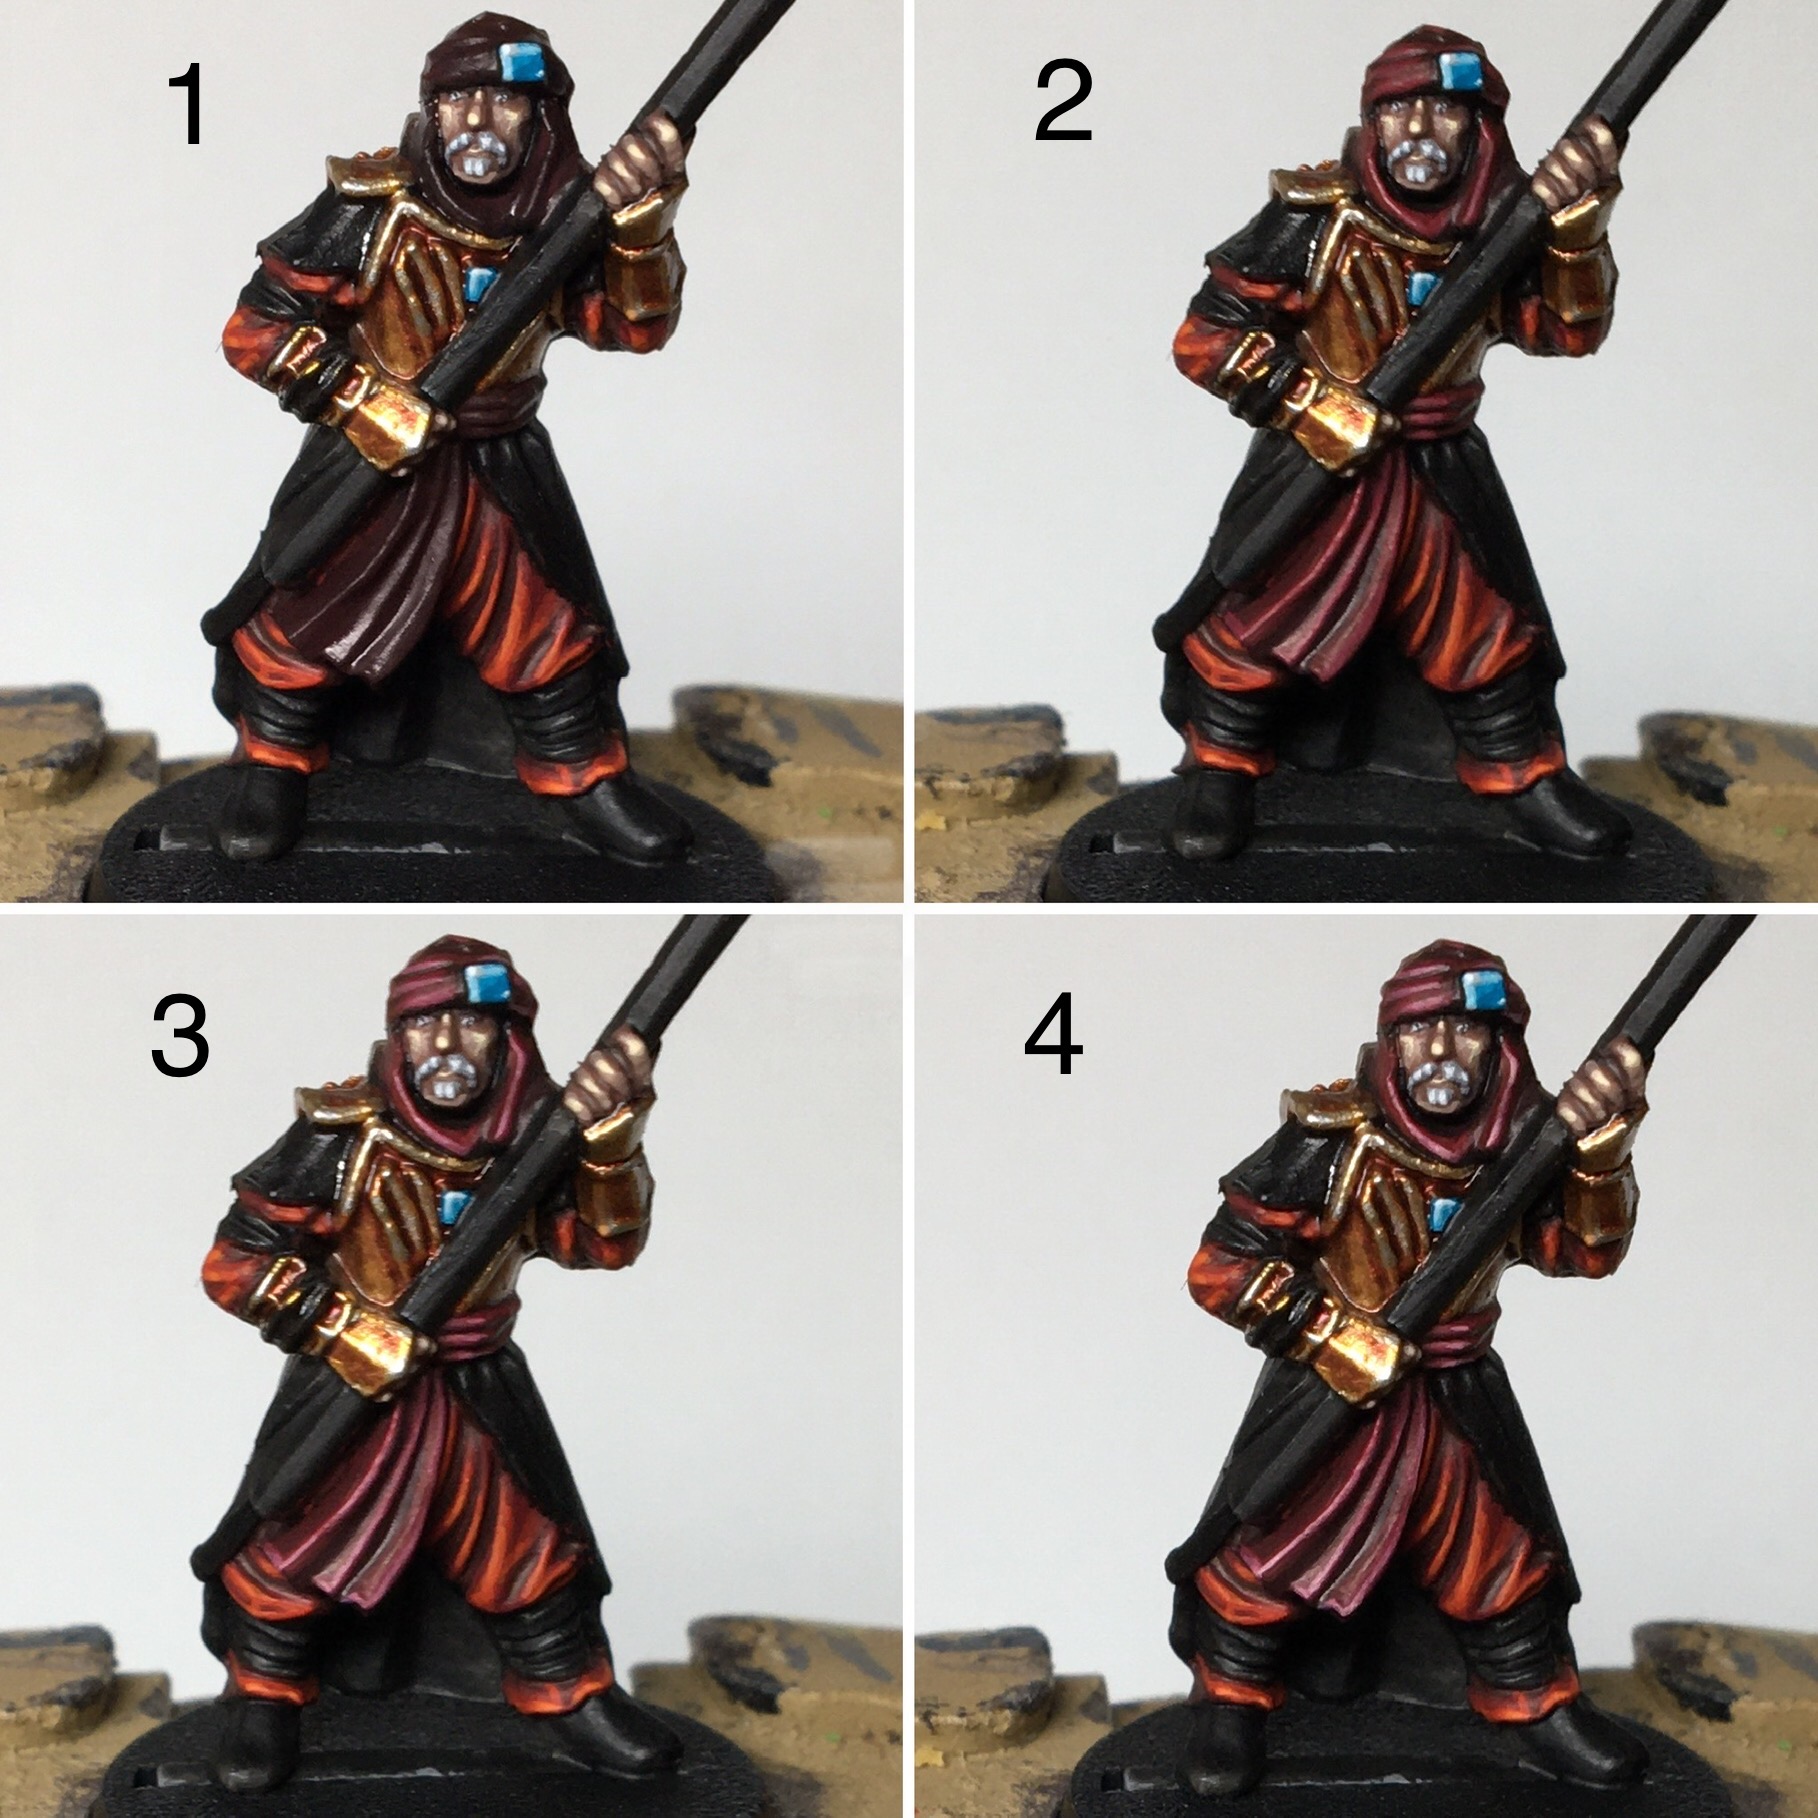
Dark red / purple cloth

1. Basecoat the fabric with a 25/75 mix of Abaddon Black / Khorne Red
2. Layer Khorne red, leaving the basecoat in the deepest folds
3. Broad edge highlight with 25/75 Khorne Red / Flayed One Flesh
4. Thin edge highlights of 50/50 Khorne Red  /Flayed One Flesh on the sharpest edges
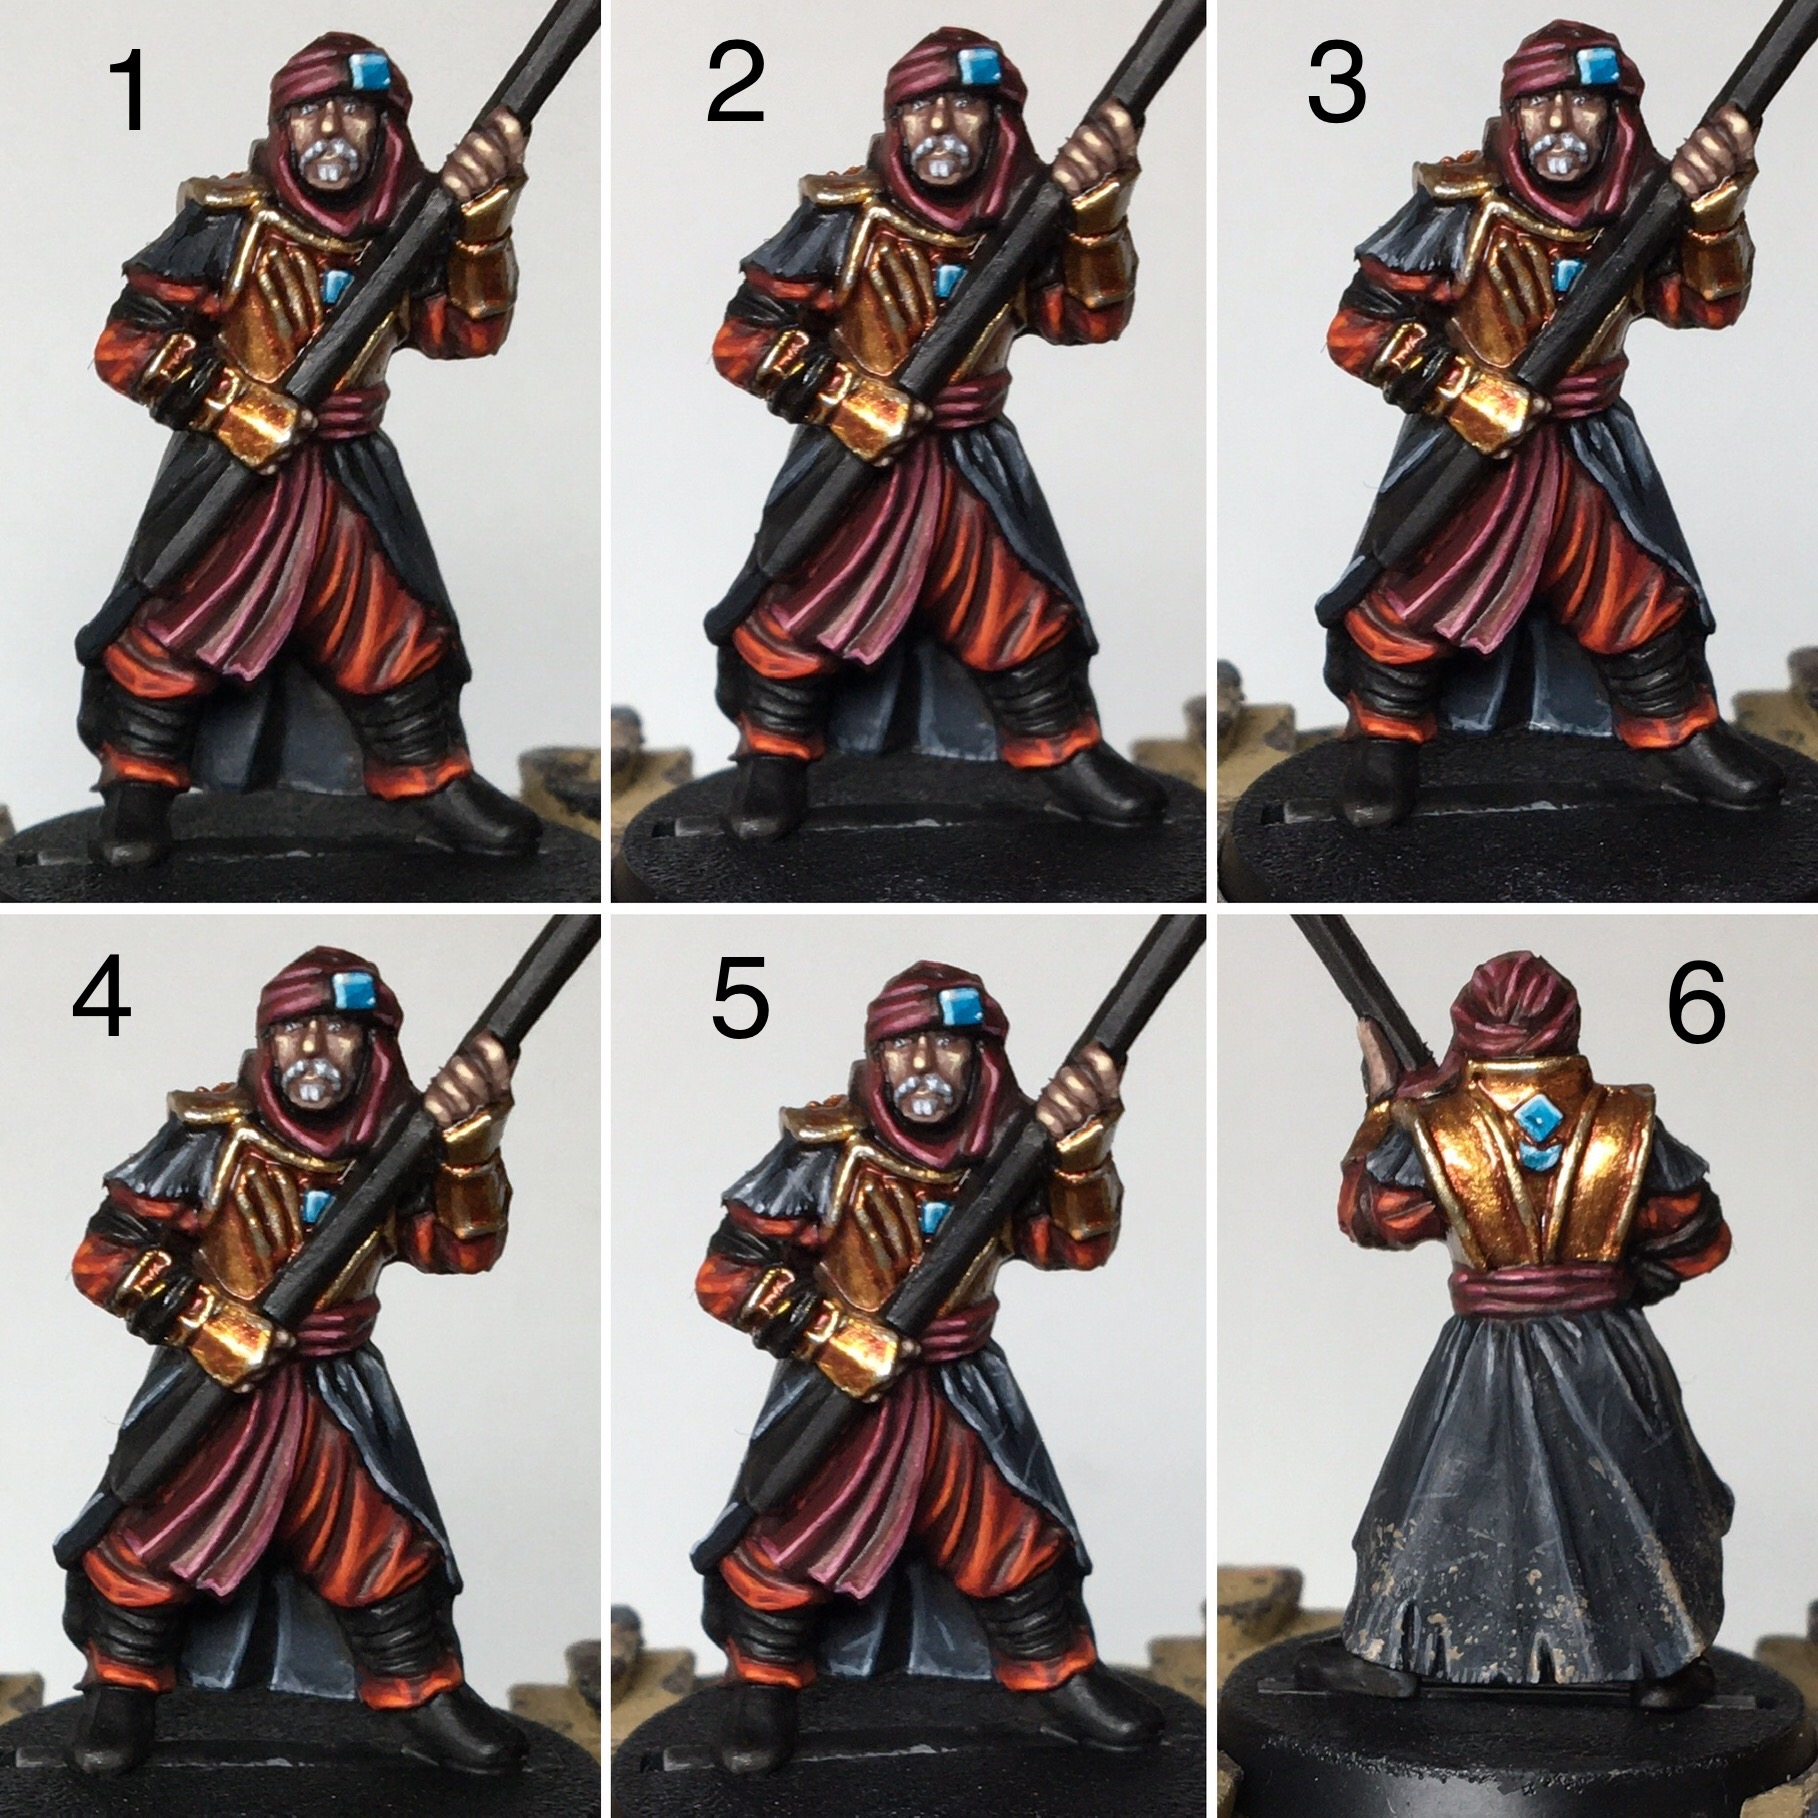
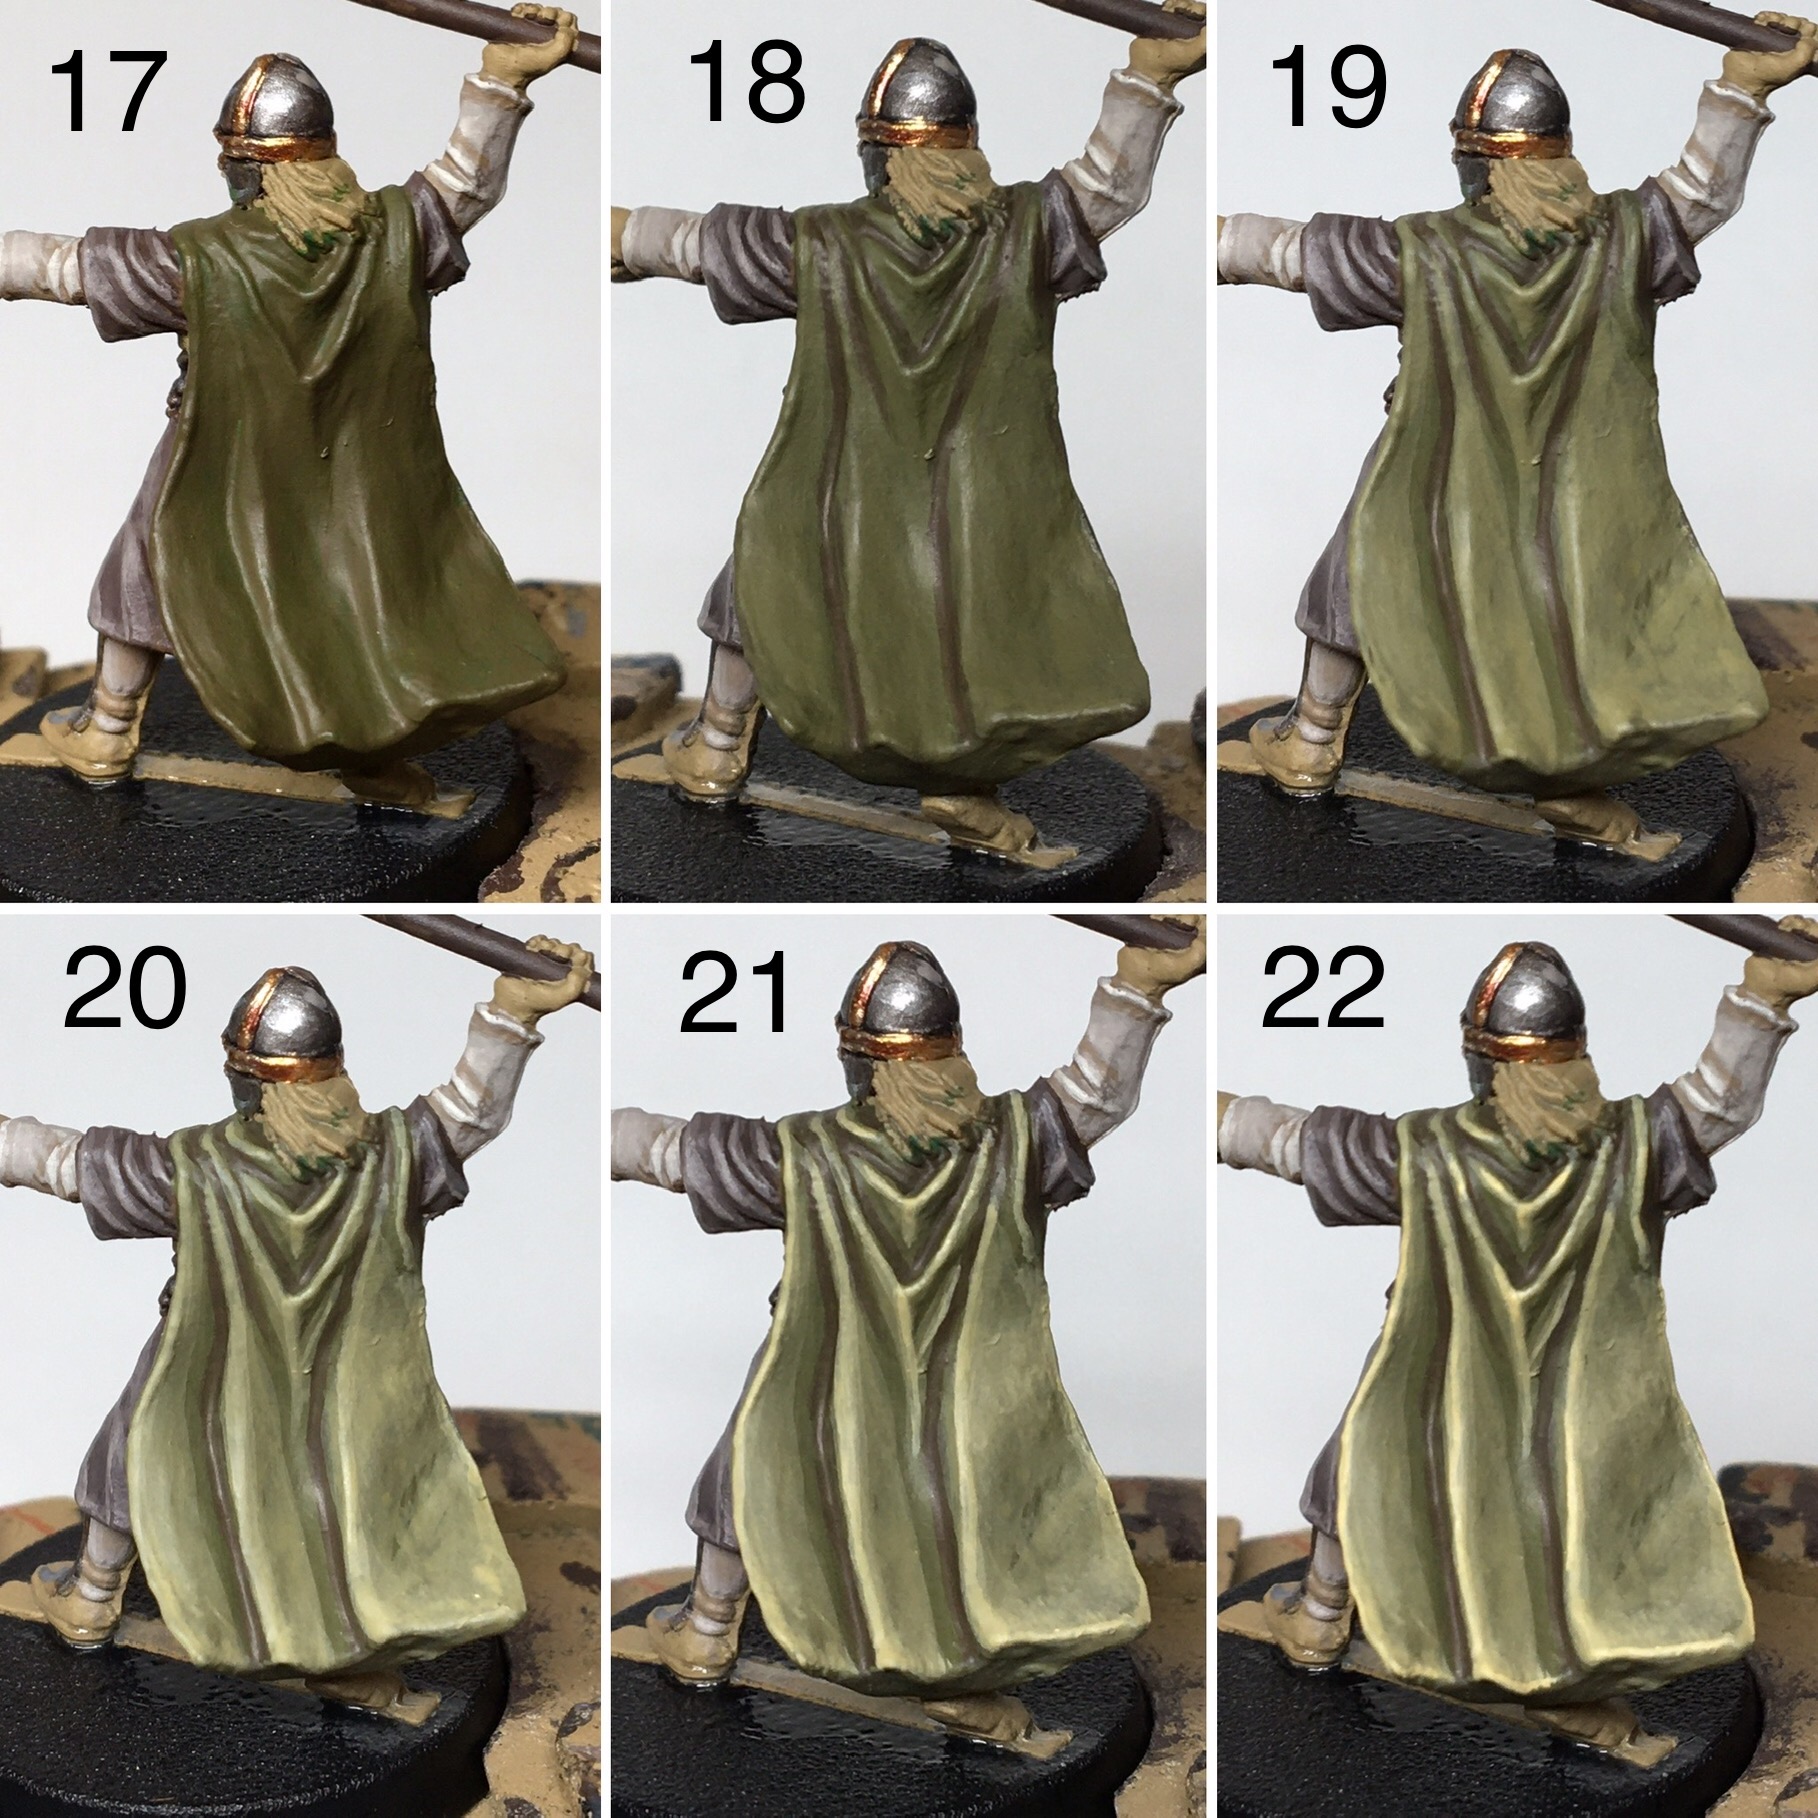


Black cloth

1. Undercoat all black areas Abaddon Black, and then basecoat with 50/50 Abaddon Black / Mechanicus Standard Grey, leaving the undercoat only in recesses
2. Layer Mechanicus Standard Grey across the raised areas
3. Edge Highlight with Dawnstone
4. Spot highlight 50/50 Dawnstone / Grey seer on the sharpest edges
5. OPTIONAL: Paint thin scratches across the fabric with Dawnstone
6. OPTIONAL: Sponge on Baneblade brown to simulate dirt and dust
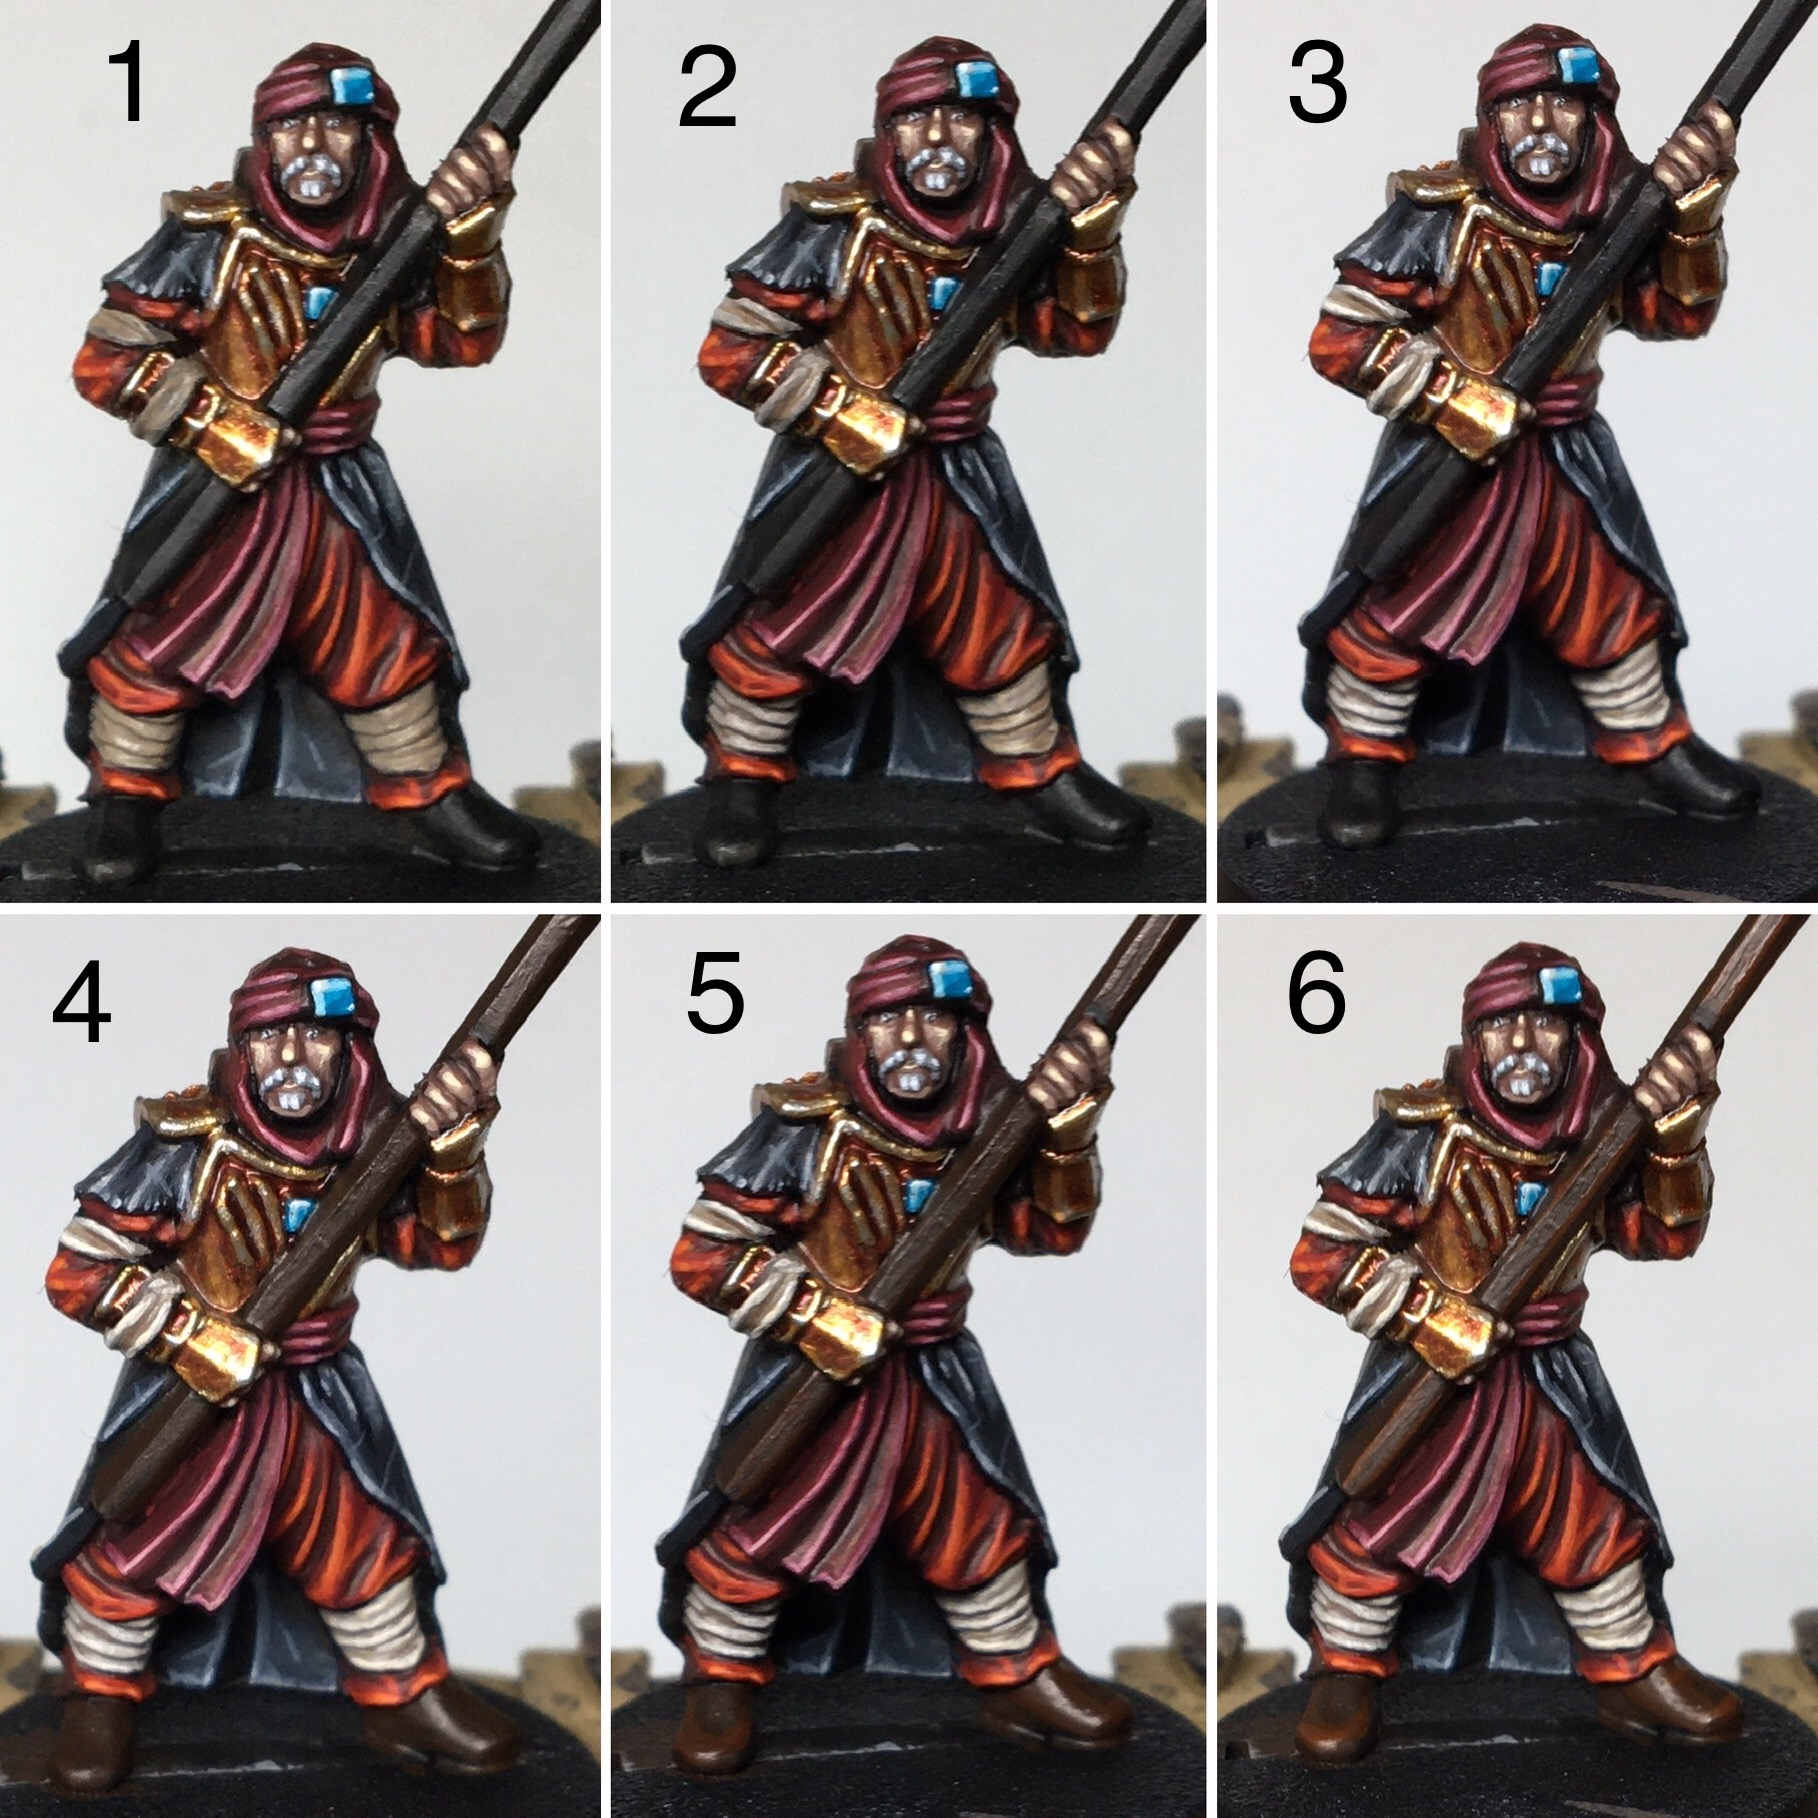


Final touches

1. Basecoat wrappings and straps Baneblade Brown
2. Layer with Rakarth Flesh
3. Edge highlight Wraithbone
4. Basecoat brown leather with Rhinox Hide
5. Layer 50/50 Rhinox Hide / Mournfang Brown
6. Edge highlight pure Mournfang Brown


And there we go! A finished Warrior of Harad, ready to join the legions of the Dark Lord. Please do let me know what you think, and also which army you'd like to see next!


Tuesday, April 13, 2021

Painting Warriors of Middle Earth: Rohan


Welcome to the first edition of a (hopefully!) ongoing series of painting tutorials. I often get asked how I paint my models, so I've decided start a semi-regular posts covering the process from beginning to end. Each time, we'll look at a particular army; if popular, I hope to eventually cover all races and armies of Middle Earth. Rather than looking at one step, these tutorials are intended to be more long-form, teaching you how to paint whole troops to a tabletop level, with extra optional steps if you want to push things a bit further! We'll also explore different colours, textures, and techniques. 

Without further ado, let's crack on! First up are the doughty warriors of Rohan. With quite a simple colour scheme of muted green and brown tones, there's instead a lot of scope for techniques like weathering to add a bit of visual interest:


Steel armour
1. Undercoat the whole model (I have used Zandri Dust here)
2. Undercoat all steel areas in Leadbelcher
3. Apply Basilicanum Grey contrast paint all over
4. Edge highlight with Stormhost silver; you can also add scratches here


Bronze armour
5. Basecoat all bronze areas with Gehenna's gold
6. Wash with Carroburg crimson
7. Edge highlight with Liberator Gold
8. OPTIONAL: Spot highlights with 50/50 Liberator Gold/Stormhost Silver on the sharpest points


Cream cloth
9. Basecoat Baneblade Brown
10. Layer Rakarth flesh, leaving Baneblade brown only in the deepest recesses
11. Highlight folds 50/50 Rakarth Flesh/Wraithbone
12. Edge highlight with Wraithbone on the highest creases


Brown cloth
13. Basecoat 75/25 Dryad Bark/Baneblade Brown; wash pure Dryad Bark into the deepest folds
14. Highlight 50/50 Dryad Bark/Baneblade brown. To add some texture you can apply this 'roughly', stippling rather than layering the highlight to make the cloth look rough
15. Smaller highlights with 25/75 Dryad Bark/Baneblade Brown, again stippled roughly on
16. OPTIONAL: Highlight the sharpest edges with pure Baneblade Brown, and add scratches across the surface of the cloth


Green cloaks
17. Basecoat Deathworld forest
18. Shade the deepest folds with 50/50 Deathworld Forest/Rhinox Hide
19. Layer 75/25 Deathworld forest/Ushabti bone over the majority of the surface
20. Layer 50/50 Deathworld forest/Ushabti bone, leaving some of the previous layer visible
21. Highlight sharper folds with 25/75 Deathworld forest/Ushabti bone
22 OPTIONAL: Spot highlight pure ushabti bone on the highest points


Flesh
23. Basecoat Knight-Questor Flesh
24. layer 50/50  Knight-Questor Flesh/Flayed One Flesh
25. Highlight raised areas with Flayed One Flesh
26. OPTIONAL: Dot Ushabti bone on the highest points (knuckles, lips etc)


Blonde hair
27. Basecoat Averland Sunset
28. Wash Reikland Fleshshade
29. Highlight strands 50/50 Averland Sunset/Ushbati bone
30. OPTIONAL: Dot pure Ushabti bone onto the highest points


Black leather
31. Basecoat Abaddon Black
32. Edge highlight with Dark Reaeper, leaving Abbaddon black in the centre
33. Smaller edge highlights with Russ Grey
34. OPTIONAL: Dot Celestra Grey onto highest points


Shields
35. Paint green areas using the same approach as the cloak
36. Basecoat the symbol Baneblade brown
37. Layer the symbol with Rakarth flesh
38. Edge highlight with Pallid Wych Flesh
39. OPTIONAL: Dot Wraithbone onto highest points
40. OPTIONAL: Sponge Rhinox hide onto lower half to simulate mud spatters

And there we have it! How to paint a warrior of Rohan, from beginning to end. As I say, I'd love to hear your feedback - would you prefer smaller, bite size tutorials over several posts? Also, any recommendations for armies you'd like to see next? Let me know in the comments!

Until next time,
Ben


Greetings, weary traveller

Hello everyone, and welcome to my Middle Earth blog! This is a new blog intended to accompany, and hopefully complement, my ongoing Historical Wargaming blog (which you can find here). In this case, it will be devoted to all things Middle Earth.

I've been painting Middle Eartn miniatures for over a decade now, inspied mostly by the seminal Battle Games in Middle Earth series (does anyone else remember it as fondly as I do?!). However, I only started blogging quite recently, as I found that whilst my Instagram account was useful for showcasing WIPs and finished models, it didn't really enable me to dive into anything more longform. That is exactly what I hope this blog will enable - longer articles like painting tutorials, discussions on colour schemes, army lists and the like. 

Anyway, without further ado, let's begin the journey! The maiden entry to the blog will be the first in what will hopefully be an ongoing series of painting tutorials looking at the various races and armies of Middle Earth. Keep your eyes peeled!


Painting Warriors of Middle Earth: Harad

  Welcome back, everyone, to the next in this ongoing series of tutorials. This week, based on several requests, we're going to take a l...